
Abstract created by Sensible Solutions AI
In abstract:
- Macworld explains how M1, M2, and Neo MacBooks are restricted to at least one exterior show natively, whereas newer M3-M5 fashions assist two to 4 shows.
- DisplayLink and InstantView software program options allow connecting as much as 5 exterior shows by way of appropriate docking stations, although they introduce 60Hz limitations and streaming content material restrictions.
- The information covers really helpful hubs, driver set up, and setup processes to beat Apple’s native show limitations. Detailed directions are offered beneath.
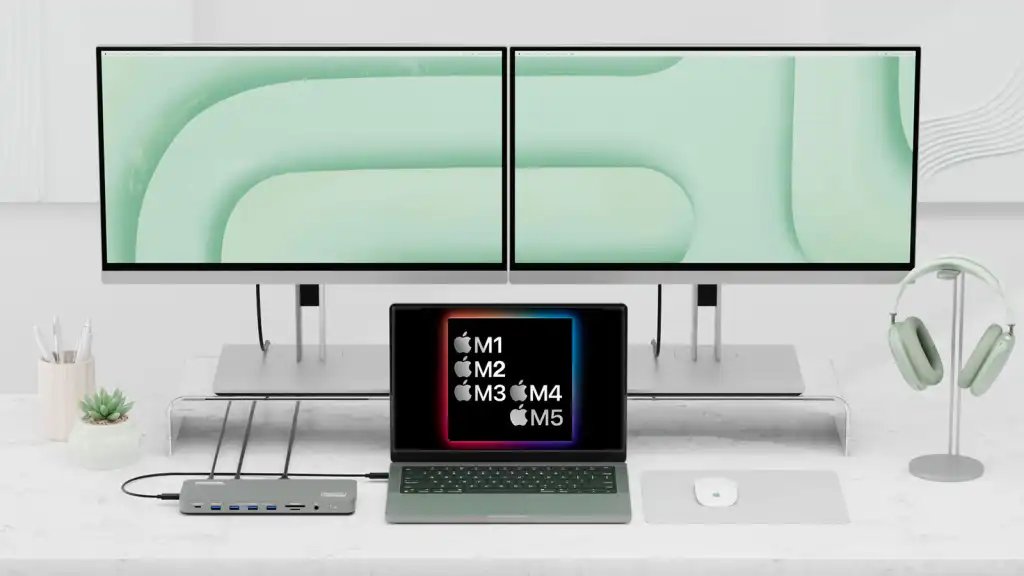
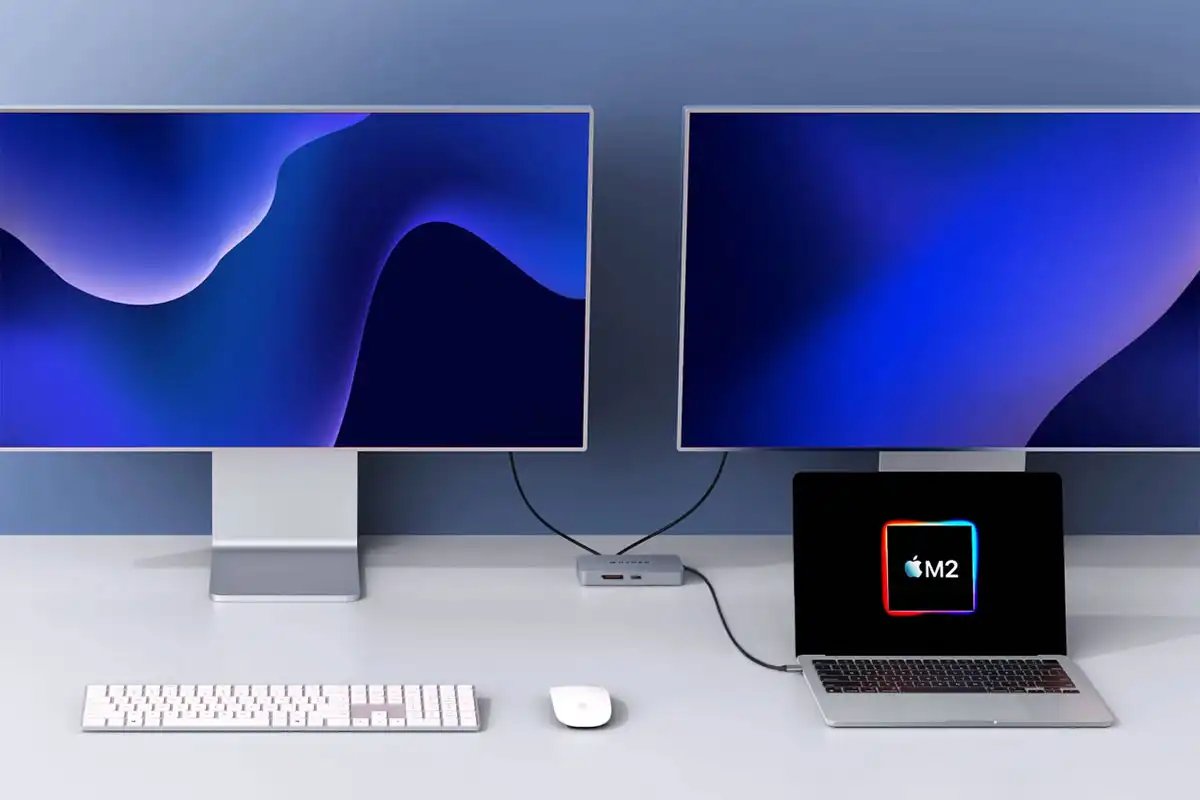
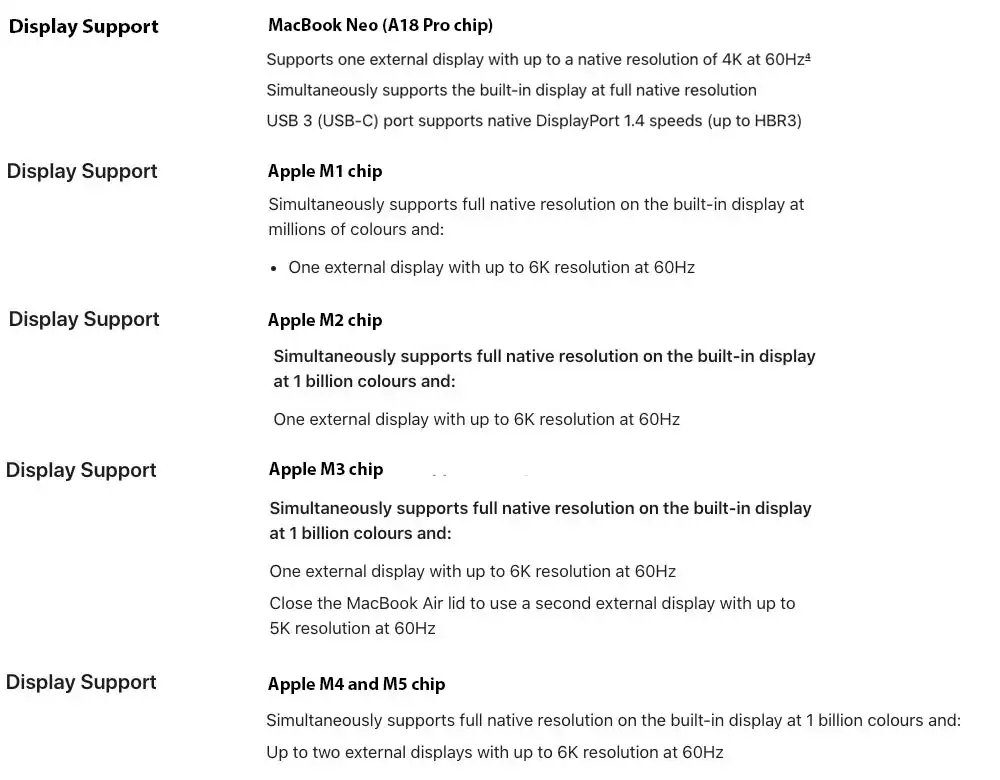
Whereas the higher-end MacBooks with M1/M2/M3/M4/M5 Professional and Max chips assist a number of exterior shows, Apple’s lower-end vary of MacBooks that use a typical M1 and M2 processor can not natively join multiple exterior monitor, and to take action the M3 has to have its lid closed. The MacBook Neo can be restricted to only one exterior monitor.
This can be a huge limitation for these entry-level Macs: M1 MacBook, M2 MacBook and MacBook Neo. Apple’s M3 MacBook Air fashions do assist two exterior displays however provided that the MacBook has its lid closed in what is called Clamshell Mode. The M3 MacBook Professional helps an identical characteristic if no less than the macOS Sonoma 14.6 replace is put in. We clarify easy methods to run twin exterior shows on an M3 MacBook in a separate article.
Who will these Mac exterior monitor suggestions assist?
• In case your Mac has a plain (non-Professional or non-Max) M1 or M2 chip, or is the MacBook Neo, it’s restricted to utilizing only one exterior monitor until you observe our suggestions and workaround right here.
• In case your Mac has a plain (non-Professional or non-Max) M3 chip, it may possibly solely use two exterior displays if its personal lid is closed (so not exhibiting its personal display screen) until you observe our suggestions and workaround right here.
• In case your Mac has an M4, M5, M4 Professional, M4 Max chip, it’s restricted to utilizing two exterior displays – add as much as 5 utilizing the workarounds.
• In case your Mac has an M5 Professional chip, it’s restricted to utilizing three exterior displays – add as much as 5 utilizing the workarounds.
• In case your Mac has an M5 Max chip, it’s restricted to utilizing 4 exterior displays – add as much as 5 utilizing the workarounds.
The options beneath, nevertheless, permit for greater than two exterior shows on plain M1, M2 Macs and MacBook Neo plus M3 Macs with their lids open if you need it. The plain M4/M5 MacBook Air and M4/M5 MacBook Professional fashions do natively assist two shows with the lid open however if you need three or extra shows for these MacBooks, then maintain studying.
In every case, there’s a software program obtain and a docking station, hub or adapter required.
Later, we record our examined and really helpful software program and {hardware} options for including multiple show to the plain M1, M2 and M3 Macs, plus MacBook Neo. You may soar straight to our record of the best DisplayLink docks if all about it. If not, learn on some time.
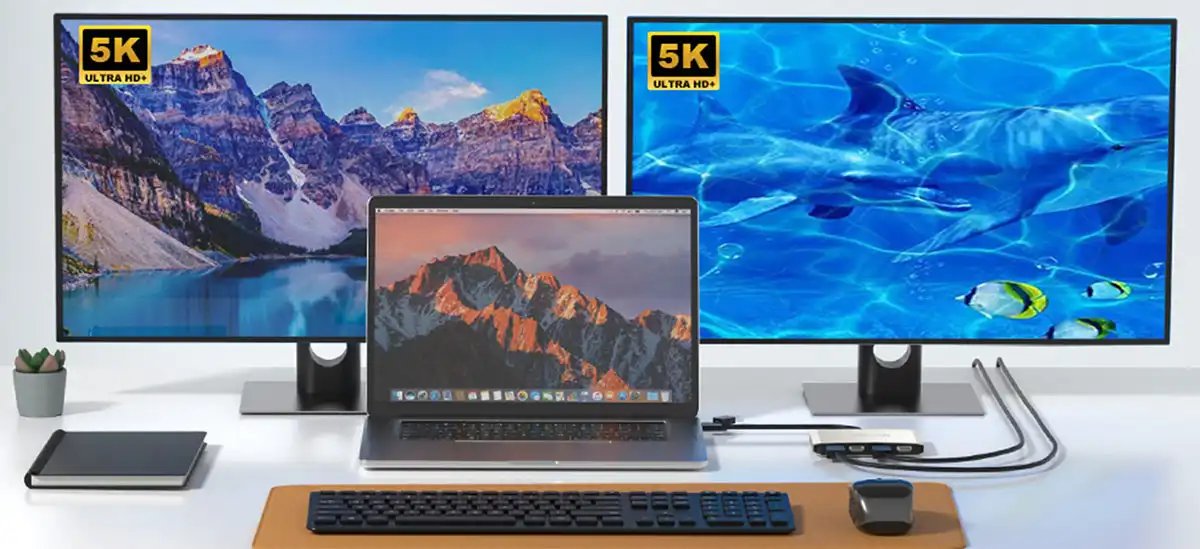
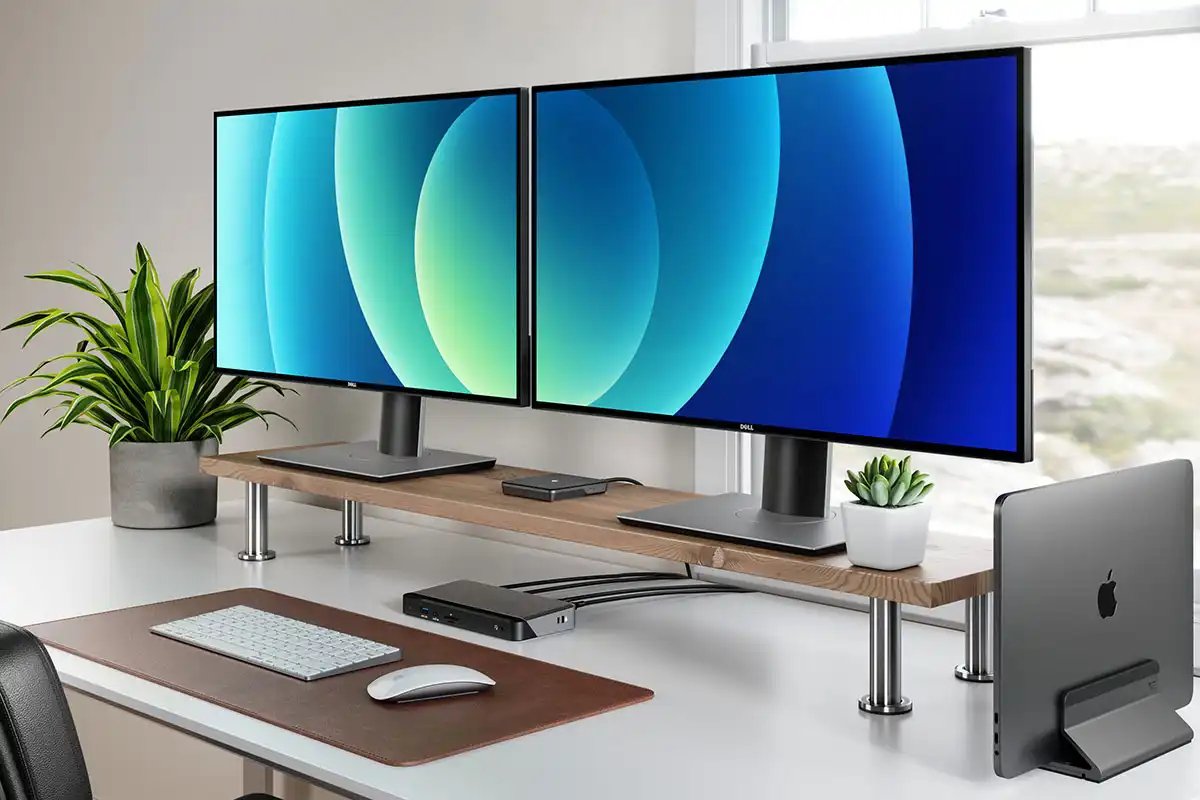
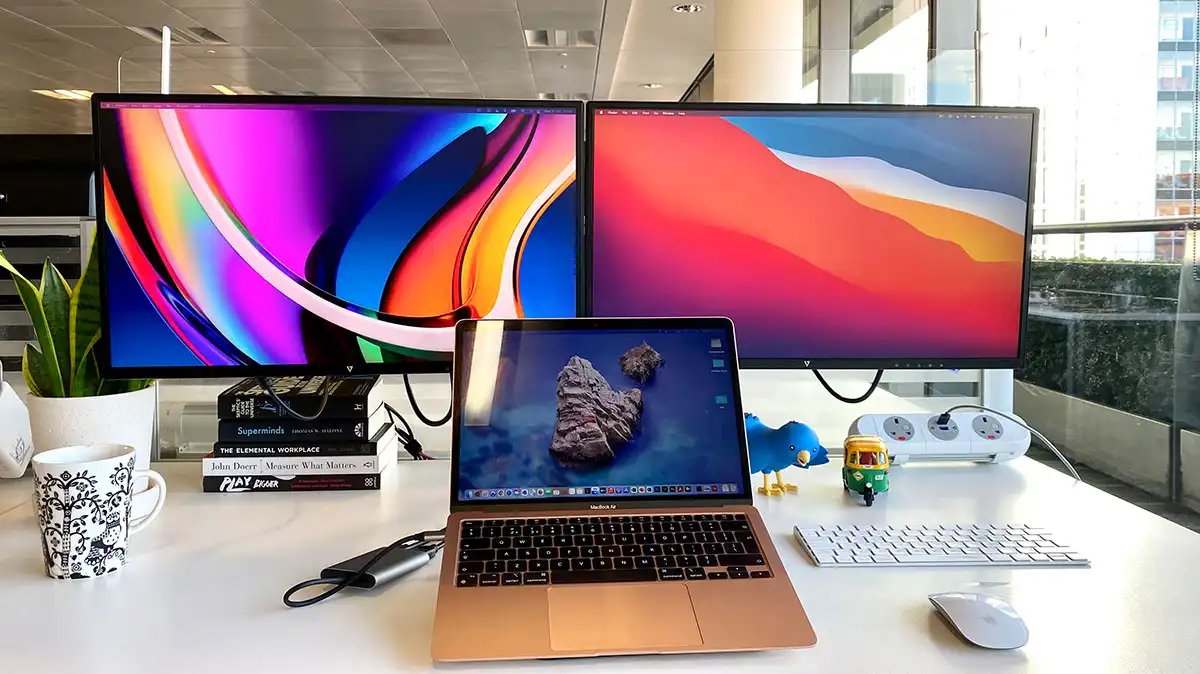
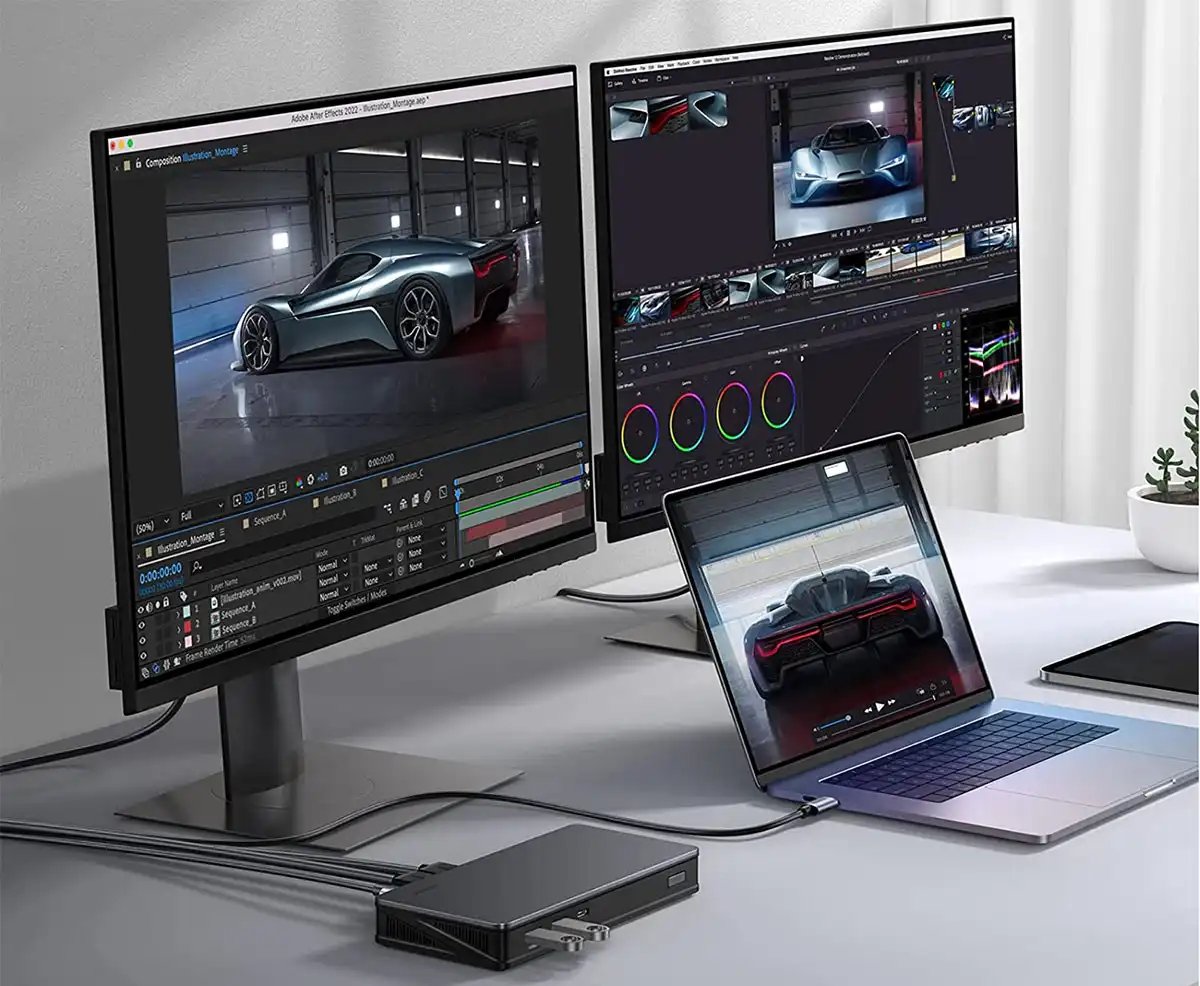
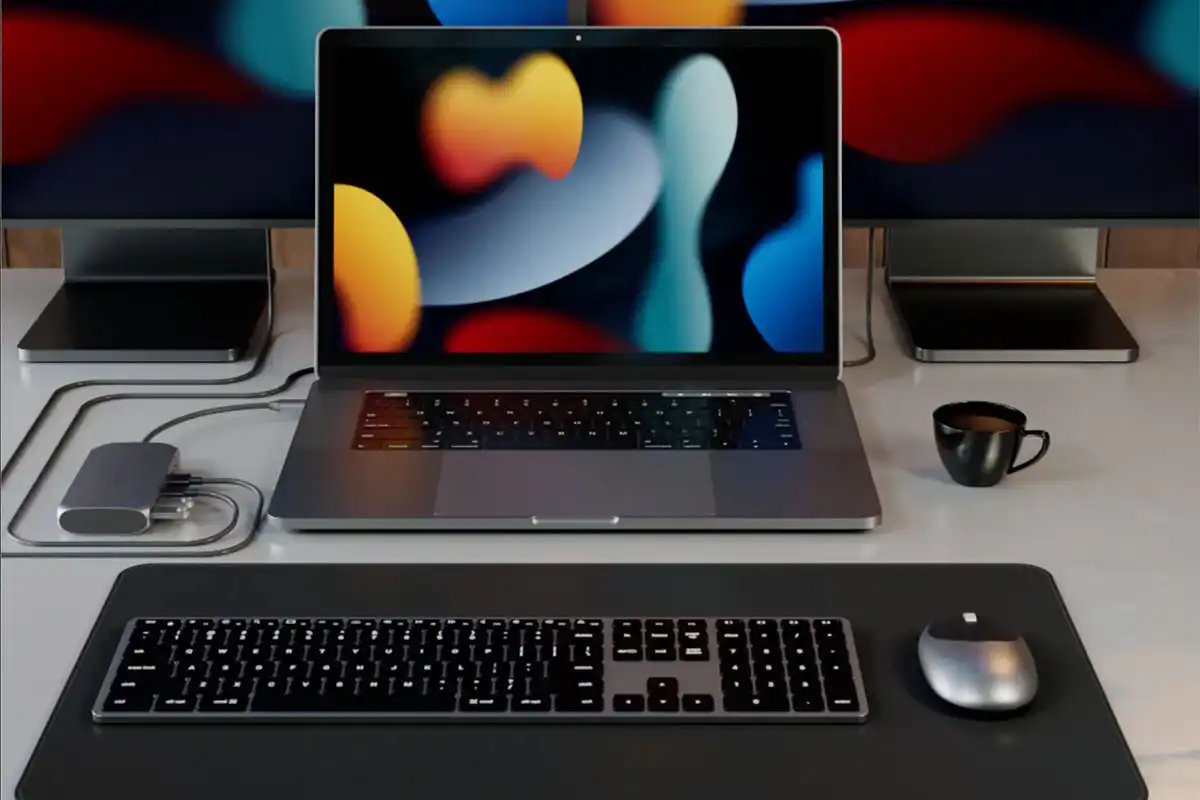
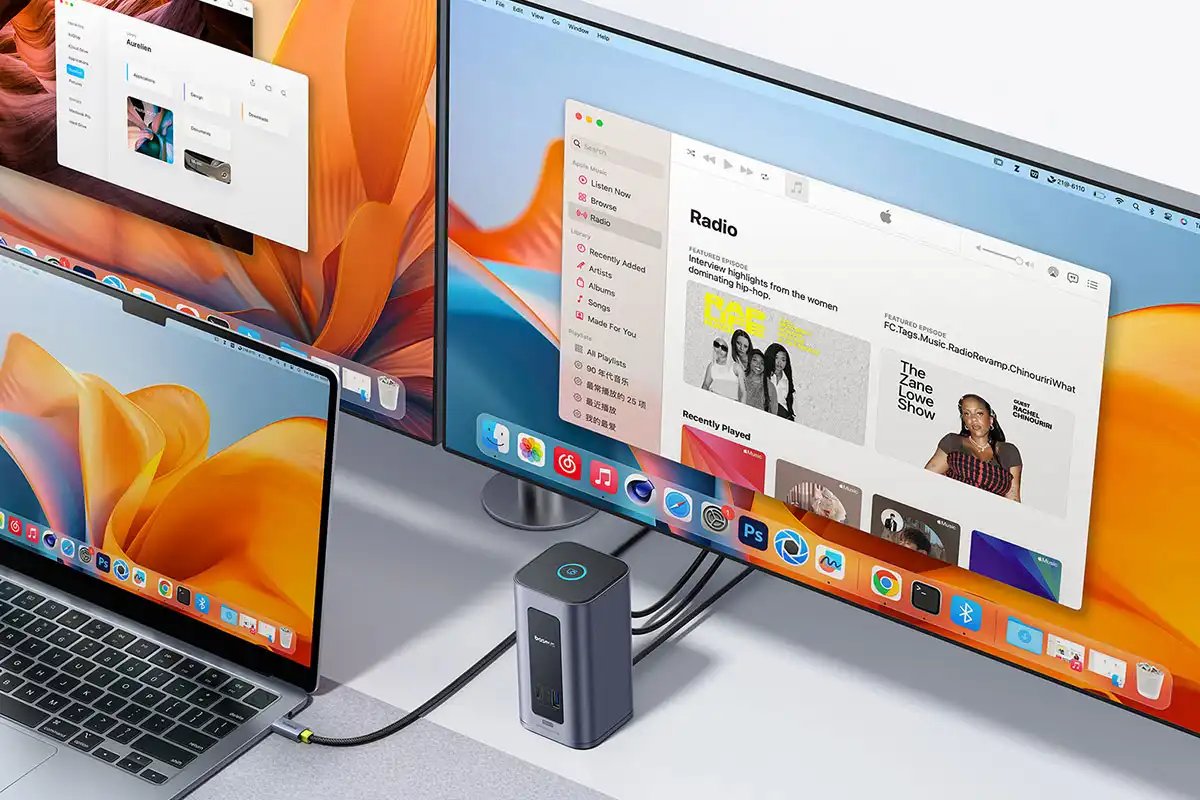
The best resolution is to get a USB graphics-enabled docking station or hub, typically referred to as a DisplayLink Dock—and we’ve reviewed the best ones later on this article. USB graphics is a software-based expertise (DisplayLink or InstantView) that compresses the video alerts from the pc to the monitor, enabling you to attach a number of exterior shows to your M1/M2/M3 or Neo MacBook.
We cowl the fundamentals of easy methods to join your Mac to an exterior monitor.
Desktop Macs will be helped, too.
Whereas the M1, M2 and Neo MacBooks natively assist only one monitor, the desktop M1 Mac Mini and M2 Mac Mini do natively assist as much as two exterior displays—one through the HDMI port and a second through USB-C. The M4 Mac mini helps as much as three shows—two shows with as much as 6K decision at 60Hz over Thunderbolt and one show with as much as 5K decision at 60Hz over Thunderbolt or 4K decision at 60Hz over HDMI.
Workaround: Set up DisplayLink software program drivers
You need to use a mix of show applied sciences to get across the M1/M2/M3/Neo MacBooks’ single-monitor limitation. DisplayLink is the commonest software program resolution that you simply pair with a appropriate dock, and SiliconMotion’s InstantView is one other. Word that the docks must state DisplayLink or InstantView compatibility—you’ll be able to’t simply set up DisplayLink drivers and hope they work with common docks and hubs. Right here, we’ll consult with all of them as DisplayLink docks for brevity.
DisplayLink allow adapters or docks to output video over USB ports that will in any other case assist solely information connections, bypassing limitations on the variety of screens a Mac can assist natively (for instance, the single-display limitation on base M1, M2, M3, and Neo Macs). Many multi-display docks use a mix of native USB-C Alternate Mode (native “Alt Mode” video output) and DisplayLink expertise. This mixture serves as a workaround to the M1/M2/M3/Neo platform supporting solely a single exterior show through USB-C.
Word that DisplayLink requires a third-party driver to be put in on the Mac. Generally, setup is simple. Among the docks we evaluate beneath supply the DisplayLink software program whenever you first join the dock to your Mac. The DisplayLink macOS app or DisplayLink Supervisor app are methods of enabling DisplayLink expertise on macOS. The app is accessible as a standalone installer relatively than by way of the mac App Retailer. There are obtain variations for macOS 26 Tahoe and earlier.
The preliminary InstantView setup is simpler than DisplayLink with the hubs from Hyper and Satechi—but it surely suffers the identical problem that Apple’s software program updates might disable it, which is able to entail putting in a more moderen model and permitting the required safety & privateness settings for display screen recording, simply as with DisplayLink. You may obtain the most recent model of InstantView software program right here. The newest model helps macOS 26 Tahoe, 15 Sequoia, 14 Sonoma, 13 Ventura and 12 Monterey.
Neither software program resolution is sophisticated and each labored nicely in our exams as you’ll be able to learn beneath. There are some disadvantages to using DisplayLink and InstantView, which we clarify intimately within the FAQ part beneath the dock chart, however none that ought to hassle most customers.
1. First, obtain the most recent Mac DisplayLink driver. As acknowledged above, some docks, do that for you but it surely’s at all times finest to make use of the most recent model.
DisplayLink Supervisor Graphics Connectivity App v. 15.1 is appropriate with macOS Sonoma 14, Sequoia 15 and Tahoe 26. For macOS Ventura 13, you want model 15; and for Monterey 12, it’s model 1.11; for Massive Sur 11, search for model 1.9, and v1.5 for Catalina 10.15. It may be managed through the DisplayLink icon within the Apple Menu bar.
Right here’s the one fiddly half: it’s essential to allow “Display screen Recording” to permit the DisplayLink Supervisor app to seize pixels and ship them to your USB peripheral.
This may be present in System Preferences below Privateness in Safety & Privateness; navigate to Display screen Recording within the record on the left, then tick the Display screen Recording permission for DisplayLink Supervisor after unlocking the padlock utilizing your admin password. You could must give up and restart DisplayLink Supervisor afterward. Don’t fear, DisplayLink isn’t recording your display screen—this simply lets it do its magic enabling a number of screens.
Set up is simple; check out the directions right here. Older variations didn’t assist laptops’ closed-display/Clamshell Mode, however 1.8.1 and later do assist Clamshell Mode if the MacBook is working macOS 11 or later.
There’s an possibility in DisplayLink supervisor to “launch at startup”, or you’ll be able to drag the DisplayLink Supervisor to your Login Objects in Customers & Teams.
2. Then join the MacBook to a DIsplayLink docking station—the dock should assist DisplayLink, as all of the reviewed merchandise listed beneath do.
3. For the primary display screen you’ll be able to join through the dock’s DisplayPort, HDMI or USB-C/Thunderbolt port, and this can be dealt with natively by the M1/M2 MacBook. If it’s essential to, you need to use a USB-C to HDMI or DisplayPort adapter.
The HDMI or DisplayPort output makes use of Alternate Mode (Alt Mode), and as it’s mainly a pipeline on to the system’s native GPU, it would behave identical to in the event you attached a USB-C to HDMI dongle to your laptop computer. This requires no person driver set up.
The second and third shows will depend on the DisplayLink software program. DisplayLink makes use of an put in driver and the system CPU and GPU to transform graphics information on the system into information packets. That information is then despatched over the cable as information packets and transformed again to video data and output to the displays through the DisplayLink chip within the docking station.
Which dock is finest?
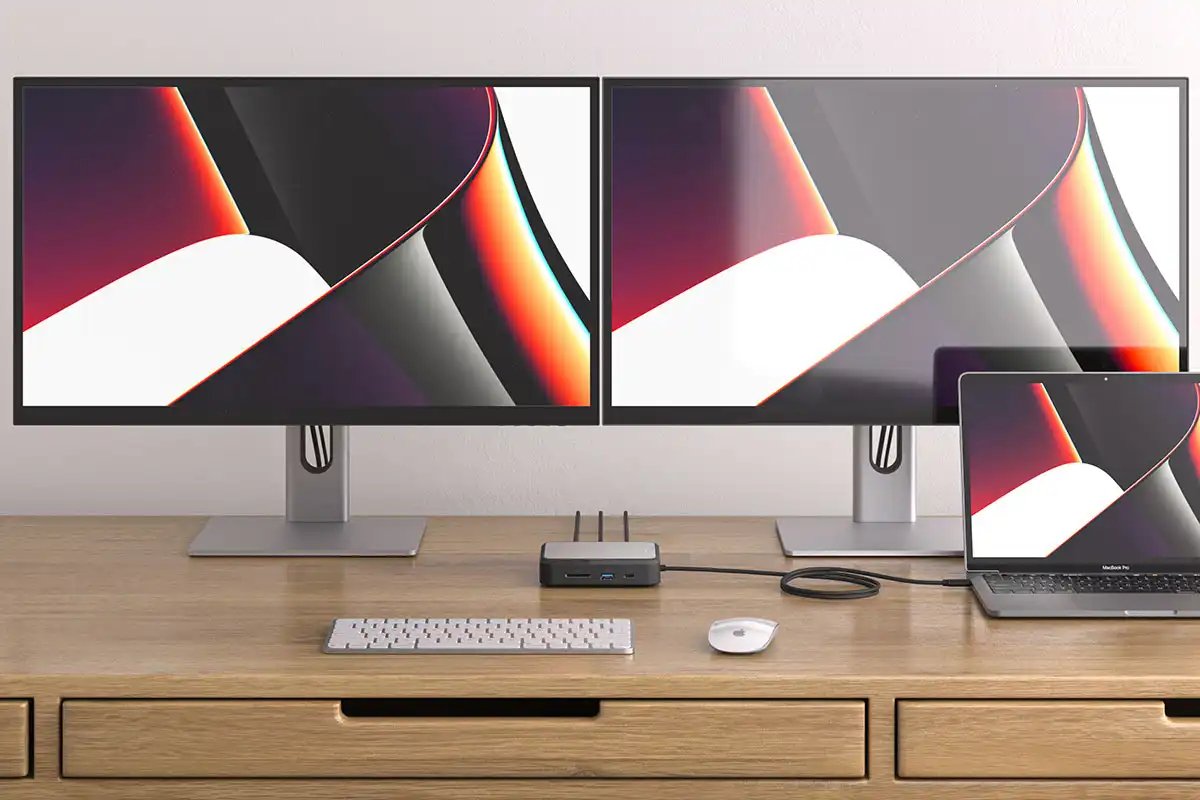
A docking station connects to your MacBook through Thunderbolt or USB-C. It then affords a number of ports that your laptop computer now has entry to. These can embrace new show ports, resembling HDMI, in addition to Ethernet for wired Web entry, USB-C/Thunderbolt/USB-A ports at various speeds, audio plugs, and card readers. An easier hub or adapter has fewer ports however might have all of the video or USB ports required.
The primary factor to recollect right here is that the dock, hub or adapter must assist both DisplayLink or InstantView for the additional multi-screen magic to work. Non-DisplayLink docking stations are nice in case your MacBook can deal with the variety of screens you want however you want extra ports and performance.
Docking station and hub producers at the moment are actively advertising their merchandise as options to the M1/M2/M3/Neo exterior show limitation—docks must assist DisplayLink to work with the software program. All of the docks and hubs reviewed beneath require both the DisplayLink obtain or one other related software program resolution, resembling InstantView, however no additional {hardware} adapter aside from the dock or hub itself. And naturally, these hubs supply the same old multi-port advantages in addition to the exterior monitor resolution.
The most effective multiscreen hubs and adapters for Neo, M1, M2, M3, M4 and M5 MacBooks
Beneath we’ve got gathered the most effective devoted hubs and docks for multiscreen M1/M2/M3/M4/M5/Neo. Word that the majority of those listed (and examined) beneath use USB-C relatively than Thunderbolt, so don’t profit from the MacBook’s potential pro-level 40-80Gbps information bandwidth however are normally cheaper. Should you require bandwidth larger than 10Gbps, go for a DisplayLink-supporting Thunderbolt dock. The MacBook Neo has USB-C relatively than Thunderbolt so is proscribed to 10Gbps anyway however can use the Thunderbolt docks, too in the event you like as USB-C and Thunderbolt are appropriate..
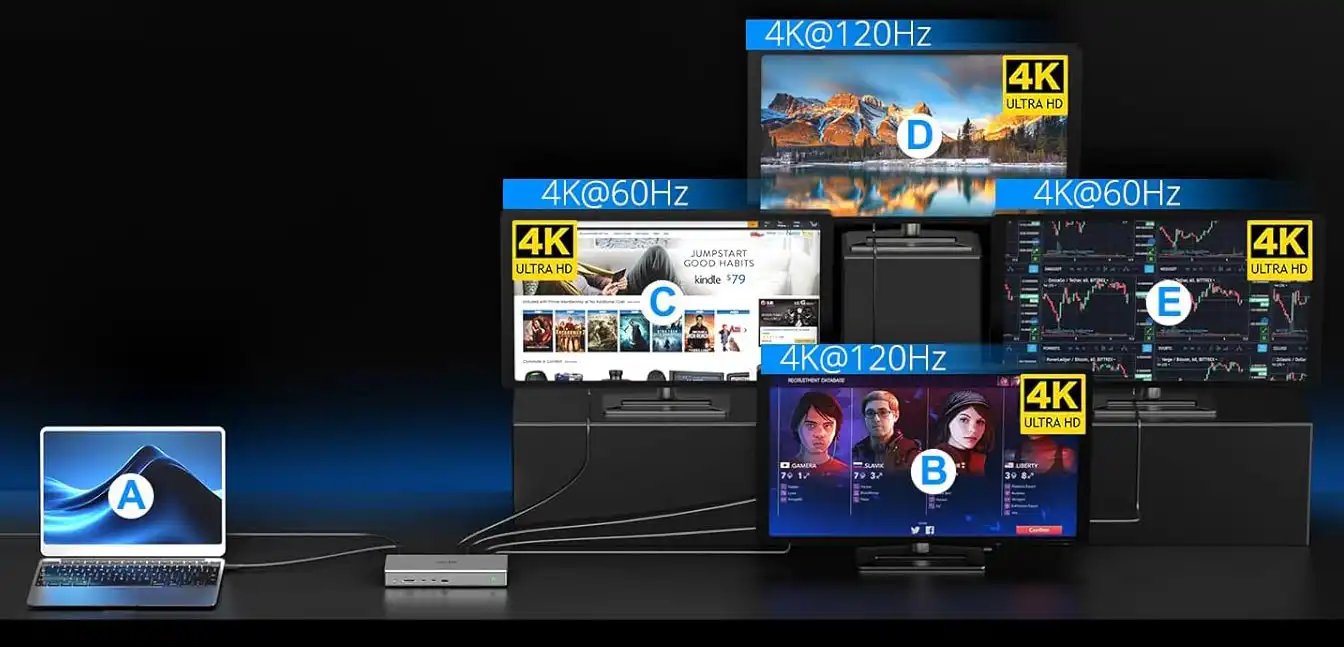
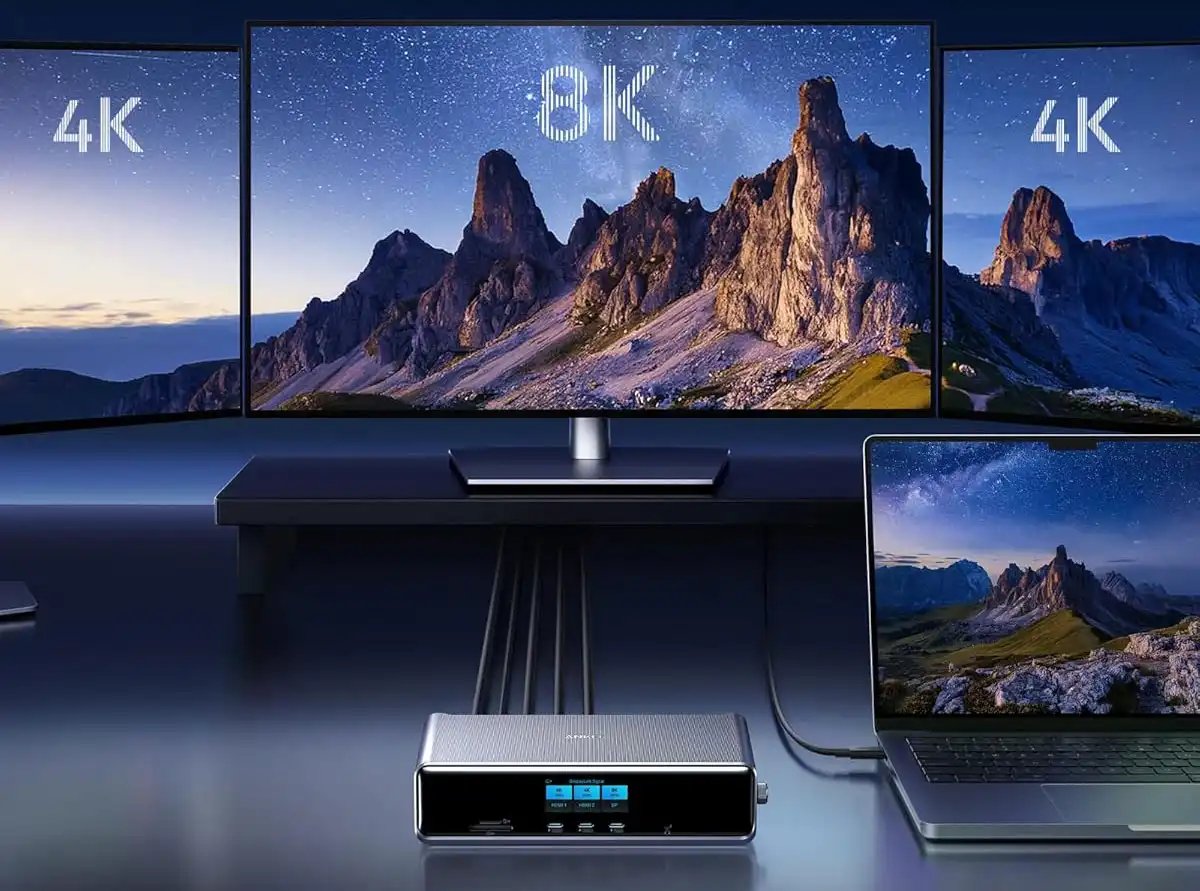
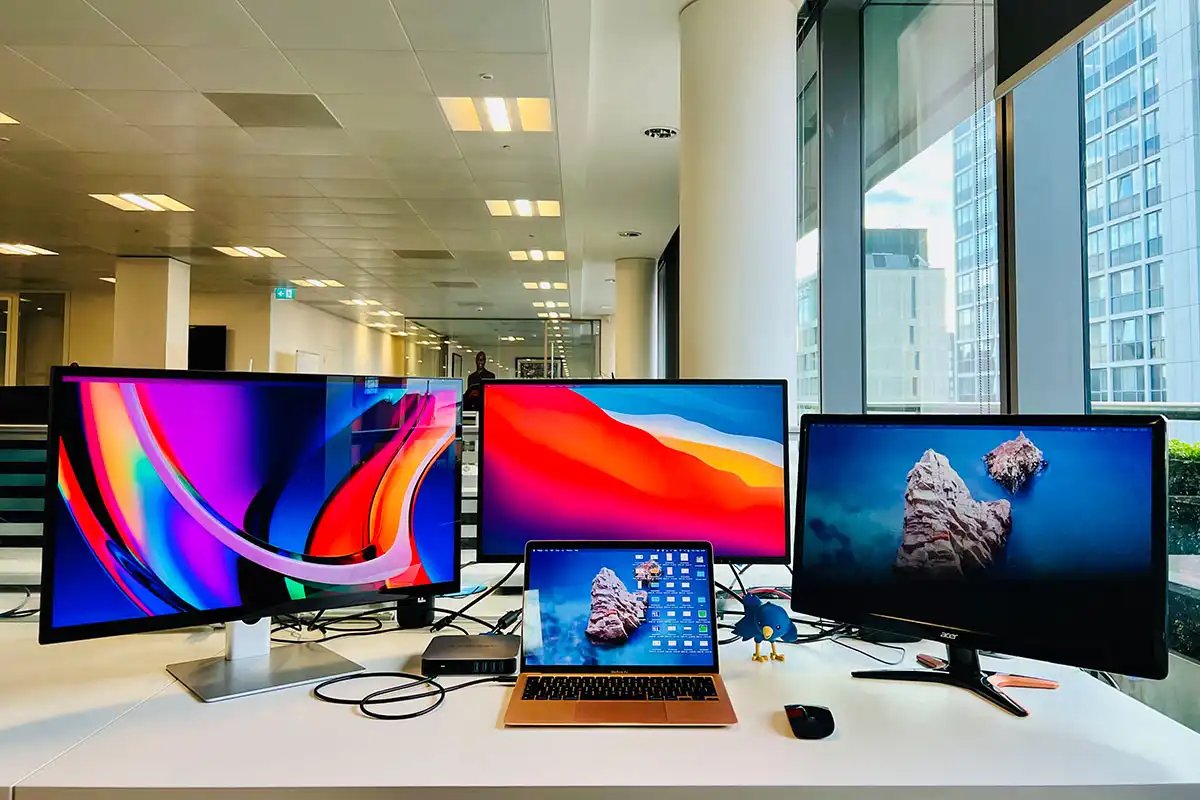
We have now examined DisplayLink docks that may assist as much as 5 exterior shows and a few that max out at two, which we count on can be lots sufficient display screen house for most individuals. You need to use a five-screen DisplayLink dock even in the event you want solely two displays, and use the spare ports for different functions.
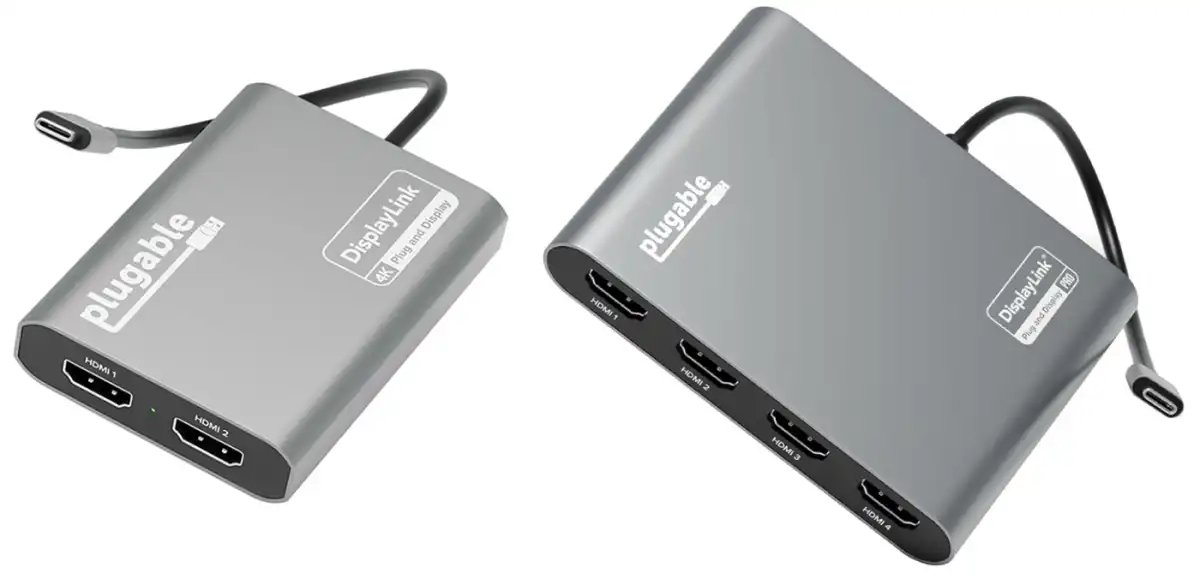
Plugable 5 Show USB-C Dock (UD-7400PD) – 5 4K shows at 60Hz
Professionals
- Helps as much as 5 exterior shows at 4K 60Hz
- 3x 8K at 60Hz shows
- 11 ports
- 2x HDMI video ports
- 140W PD laptop computer charging
- 2.5Gb Ethernet
Cons
- No SD card reader
- North America solely
- Connection: USB-C (10Gbps)
- Software program: DisplayLink
- Max screens: 5
Let’s start with the DisplayLink dock that helps probably the most exterior shows: the Plugable UD-7400PD permits even M1 MacBook and Neo customers to run as much as 5 4K shows at a 60Hz refresh price. That is made doable by use of the most recent Synaptics’ DisplayLink DL-7400 chipset. No different dock can match it. Though 5 shows might be overkill for many customers, monetary and information analysts can’t have sufficient screens and can like it. You don’t have so as to add 5 shows, after all, however this dock is the one that may allow you to accomplish that. It even affords one thing to the mighty M5 Max MacBook that may natively assist 4 exterior shows; with the Plugable UD-7400PD it may possibly transfer to 5.
There are two HDMI ports (one HDMI 2.1 for 8K and one 2.0) plus three downstream USB-C ports to attach both these shows or different units. There are two quick 10Gbps USB-A ports, speedy 2.5Gb Ethernet and an audio jack, however no SD card reader. On the entrance of the dock, one of many USB-C ports can output energy to a related gadget at 30W, which is ideal if you wish to fast-charge an iPhone and even an iPad.
Should you want quicker bandwidth, the Satechi Thunderbolt 4 Docking Station with DisplayLink (reviewed beneath) boasts 40Gbps information switch and helps 4 shows for the M3 MacBook Air (whereas shut in Clamshell Mode), however with it the M1 and M2 MacBooks are restricted to a few (one at 6K and two at 4K).
IT managers will respect Plugable’s DockTag expertise that works with the UD-7400PD, a web-based resolution designed for hot-desking and real-time IT asset administration in mixed-platform workplaces.
Learn our full
Plugable 5 Show USB-C Dock (UD-7400PD) evaluate
Satechi Thunderbolt 4 Docking Station with DisplayLink – three 4K shows at 60Hz for M1/M2/Neo, 4 for M3/M4/M5
Professionals
- Helps as much as 4 exterior shows at 4K 60Hz
- One show at 6K 60Hz
- 11 ports, inc. three 40Gbps Thunderbolt 4
- 2x HDMI 2.0 video ports
- Speedy SD card reader
- 96W laptop computer charging and 180W energy provide
Cons
- Solely three shows for M1/M2/Neo
- U.Okay. customers want native energy cable
- Connection: Thunderbolt 4 (40Gbps)
- Software program: DisplayLink
- Max screens: 4
Whereas plain M1/M2/Neo MacBooks are restricted to a few exterior shows utilizing this dock when DisplayLink software program is put in, M3/M4/M5 and M1/M2/M3/M4 Professional/Max MacBooks can connect with 4 4K at 60Hz.
Different docks reviewed right here additionally permit M1 and M2 Macs to connect with three shows, however what we actually like concerning the Satechi Thunderbolt 4 Docking Station with DisplayLink is true there in its identify: it’s a full Thunderbolt 4 dock relatively than USB-C. It subsequently affords 40Gbps data-transfer charges in comparison with the 10Gbps that you simply’ll discover on many of the different docks reviewed right here. The Plugable TBT-6950PD, reviewed beneath, is similar to this Satechi dock. Word that the Neo makes use of 10Gbps USB-C relatively than Thunderbolt, so is proscribed to that pace, though it would nonetheless work with Thunderbolt docks.
That Thunderbolt port connection additionally permits one of many three screens to be at 6K decision (60Hz) whereas the opposite two through HDMI can be 4K at 60Hz.
There are two HDMI 2.0 ports plus a beneficiant three downstream Thunderbolt 4 ports (in addition to one upstream TB4 to the laptop computer). It doesn’t host any further USB-C ports however the three Thunderbolt 4 ports (40Gbps information switch, 15W energy output) are backwards appropriate with USB-C. There are two quick 10Gbps USB-A ports, too, plus a UHS-II SD card reader, Gigabit Ethernet and an audio jack.
Non-Professional/Max M3, M4 and M5 Macs can connect with 4 shows utilizing this dock, so long as the laptop computer’s lid is closed (clamshell mode). It’s additionally an incredible possibility for M1/M2/M3/M4 Professional customers normally restricted to 2 exterior shows, or M5 Professional customers who’re restricted to a few.
U.Okay. prospects should buy direct from Satechi (with a small delivery payment) however might want to buy a neighborhood energy cable.
Satechi additionally sells a 12-port USB-C-based Triple 4K Show Docking Station that helps three 4K shows at 60Hz utilizing DisplayLink. It’s priced the identical because the Satechi Thunderbolt DisplayLink Dock. Usually we’d at all times decide a Thunderbolt dock over USB-C however this one hosts a mixture of DisplayPort and HDMI ports that provides a extra versatile monitor alternative than the Thunderbolt dock’s two HDMI and three TB4 ports. Should you desire DisplayPort to your monitor connection it is best to contemplate this USB-C dock though a easy USB-C to DisplayPort adapter will work the identical magic on the TB dock.
Learn our full
Satechi Thunderbolt 4 Docking Station with DisplayLink evaluate
Plugable Thunderbolt 4 Docking Station (TBT-6950PD) – three 4K shows at 60Hz for M1/M2, 4 for M3/M4/M5

Professionals
- Helps as much as 4 exterior shows at 4K 60Hz
- One show at 6K 60Hz
- 11 ports, inc. three 40Gbps Thunderbolt 4
- 2x HDMI 2.0 video ports
- Speedy SD card reader
- 96W laptop computer charging and 180W energy provide
Cons
- Solely three shows for M1/M2/Neo
- North America solely
- Connection: Thunderbolt 4 (40Gbps)
- Software program: DisplayLink
- Max screens: 4
This dock is nearly similar to the Satechi Thunderbolt 4 DisplayLink dock reviewed above. M1/M2/Neo Mac homeowners can join as much as three exterior shows, and M3 and M1/M2/M3/M4/M5 Professional and M1/M2/M3/M4 Max customers can connect as much as 4 displays. The M5 Max doesn’t need assistance to assist 4 exterior displays.
The Thunderbolt port means one of many three screens will be at 6K decision (60Hz) whereas the opposite two through HDMI can be 4K at 60Hz.
The USB ports are no less than 10Gbps and the SD card reader can be quick at 312MBps.
The Plugable model has a number of benefits over the Satechi: a barely longer (1m vs 0.8m) Thunderbolt cable, Kensington lock slot and two-year guarantee (vs 1 yr from Satechi).
Learn our full
Plugable Thunderbolt 4 Docking Station for 4K Quad Displays evaluate
WAVLINK USB-C DisplayLink (DL7400) Docking Station – 4 4K shows at 60Hz for M1/M2/M3/M4/M5
Professionals
- Helps as much as 4 exterior shows at 4K 60Hz
- 2x 8K at 60Hz show
- 2.5Gb Ethernet
- 30W USB-C
- 14 ports
- 2x HDMI 2.0 video ports
- Speedy SD card readers
- 100W laptop computer charging and 160W energy provide
- Connection: USB-C (10Gbps)
- Software program: DisplayLink
- Max screens: 4
Whereas the Satechi and Plugable Thunderbolt DisplayLink docks assist 4 shows for the M3 MacBook Air (whereas shut in Clamshell Mode), the M1 and M2 MacBooks are restricted to a few (one at 6K and two at 4K) utilizing these docks. The Wavlink’s newer DL7400 chipset permits for even the M1 and M2 Macs to connect with 4 shows at spectacular refresh charges: 1x 4K at 120Hz and 3x 4K at 60Hz.
As such, in the event you want 4 shows to be hooked as much as your M1 or M2 MacBook, the Wavlink dock is the higher alternative. Plugable’s use of the identical chipset on its UD-7400PD dock, reviewed above, helps as much as 5 shows.
It’d lack the Satechi and Plugable docks’ quicker Thunderbolt connection but it surely beats them on community speeds with a 2.5Gb Ethernet port—2.5 instances quicker in case your community matches this (it’s backwards appropriate with 1GbE).
The USB ports are no less than 10Gbps and the SD and microSD card readers are additionally speedily rated at 312MBps.
Learn our full
WAVLINK USB-C DisplayLink (DL7400) Docking Station evaluate
Wavlink Twin 4K DisplayPort & HDMI Adapter – two 5K shows at 60Hz
Professionals
- Helps two exterior shows at 5K 60Hz
- 2x DisplayPort 1.4 video ports
- 2x HDMI 2.0 video ports
Cons
- No USB ports, Ethernet and so forth
- No passthrough laptop computer charging
- Connection: USB-C (5Gbps)
- Software program: DisplayLink
- Max screens: 2
Additionally from Wavlink this easy, transportable and inexpensive adapter doesn’t provide you with a great deal of further USB ports, Ethernet or card readers like a hub or docking station would, but it surely affords 4 highly effective video ports: two DisplayPort 1.4 and two HDMI 2.0.
When you’ve put in the DisplayLink drivers, this implies an M1/M2/M3 MacBook can run two prolonged shows at as much as 5K (5120-x-1440) at 60Hz utilizing a mix of those video ports. You’d want to make use of each DisplayPort 1.4 ports for the utmost 5K decision—the HDMI 2.0 ports max out at 4096-x-2160 at 60Hz.
There’s no passthrough charging so that you’ll want to make use of one other of the MacBook’s Thunderbolt ports to maintain the laptop computer powered up in use.
Plugable USB-C Twin HDMI Adapter – two 4K shows at 60Hz
Professionals
- Twin 4K monitor assist for M1/M2/M3 Macs
- Quad 4K mannequin accessible
Cons
- No USB ports, Ethernet and so forth
- No passthrough laptop computer charging (twin mannequin)
- Connection: USB-C (5Gbps)
- Software program: DisplayLink
- Max screens: 2
One other easy one-function inexpensive adapter, the Plugable USB-C Dual HDMI Adapter (USBC-6950M), pictured beneath left, makes use of DisplayLink to allow twin 4K 60Hz shows for M1, M2 and Neo MacBooks with two HDMI ports. Just like the Wavlink Twin 4K DisplayPort & HDMI Adapter it’s no dock but it surely does the multi-screen M1/M2/Neo job you require with out fuss.
Plugable
There’s a barely pricier (however nonetheless cheaper than a dock) model, the Plugable Dual 4K DisplayPort & HDMI Adapter (USBC-7400H4) pictured above proper, that helps 4 exterior 4K shows at 60Hz and options 90W passthrough charging to the laptop computer.
Anker Prime Triple Show 14-in-1 Docking Station – two 4K shows at 60Hz plus one 8K/60Hz
Professionals
- Helps three shows: two 4K 60Hz and one 8K 60Hz
- 14 ports, inc. 10Gbps USB-C & 2.5GbE
- Informative entrance show
- 2x HDMI, 1x DisplayPort
- 3x 100W USB-C ports
- 140W PD laptop computer charging
Cons
- 160W energy provide lower than excellent
- Expensive for USB-C
- Connection: USB-C (10Gbps)
- Software program: DisplayLink
- Max screens: 3
Anker calls on DisplayLink for this handsome docking station to assist as much as three exterior 4K shows at a formidable 60Hz refresh price—certainly the 2 HDMI ports assist 4K at 60Hz, and the DisplayPort able to 8K at 60Hz.
It features a bunch of spectacular non-display ports. It could fast-charge even the top-end 16-inch MacBook at a full 140W PD 3.1, and boasts three 100W USB-C ports on the entrance alongside an impressively informative good show.
Nonetheless, it’s let down considerably by its weak total most 160W energy—sufficient for a lot of docks however disappointing on a dock with 440W of doable energy from its USB-C ports. An influence provide of no less than 240W would have been extra helpful.
This dock’s SD and MicroSD are additionally not the quickest at 104MBps relatively than 312Mbps, as seen on another docks. Its 2.5Gb Ethernet can be welcomed by customers on a quick community, and offers future proofing for the remainder of us.
Learn our full
Anker Prime Docking Station (14-in-1, Triple Show, DisplayLink) evaluate
Alogic DX3 Triple 4K Show Common Docking Station – three 4K shows at 60Hz

Professionals
- Helps three exterior shows at 4K 60Hz
- 12 ports, inc. 10Gbps USB-C
- 3x DisplayPort 1.4 video ports
- Speedy SD and MicroSD card readers
- 100W laptop computer charging and 135W energy provide
- Connection: USB-C (10Gbps)
- Software program: DisplayLink
- Max screens: 3
This Alogic DisplayLink docking station helps as much as three exterior 4K shows at a formidable 60Hz refresh price and has an array of helpful non-display ports. It could energy the related laptop computer at 100W and has an honest 135W exterior energy provide so doesn’t require an additional USB-C charger.
The DisplayLink obtain hyperlink is clearly proven within the person handbook, and directions make sense—though you want a magnifying glass to learn them!
The DX3 has three DisplayPort 1.4 ports however no HDMI, so that you’ll want so as to add an adapter between dock and show in the event you desire HDMI. As you’ll want to purchase video cables anyway, this doesn’t matter as costs for straight cable and adapter cable are shut sufficient.
This dock has two card readers: SD and MicroSD, each at prime 312MBps UHS-II—permitting you so as to add cheap transportable storage to your laptop computer setup.
It additionally has Gigabit Ethernet, 4 USB-A (one with 7.5W charging) and two 10Gbps USB-C (one 100W PD upstream to the laptop computer, and one 7.5W smaller gadget charging).
Reviewed beneath is Alogic’s DX2, which helps two 4K shows at 60Hz and lacks among the different ports discovered on the DX3. in the event you simply want two exterior displays to your M1/M2/M3/Neo MacBook this can be a less expensive possibility.
Alogic DX2 Twin 4K Show Common Docking Station – two 4K shows at 60Hz
Professionals
- Helps two exterior shows at 4K 60Hz
- 10 ports
- 2x DisplayPort 1.4 video ports
- 65W laptop computer charging and 100W energy provide
- Connection: USB-C (10Gbps)
- Software program: DisplayLink
- Max screens: 2
Whereas we desire Alogic’s DX3, reviewed above, that helps as much as three 4K shows and affords extra ports and quicker charging for not far more value, the DX2 is ok if all you require is 2 top-end displays related to your mid-sized M1/M2/Neo MacBook.
It options two DisplayPort 1.4 ports, one 10Gbps USB-C with 7.5W charging, three 5Gbps USB-A ports (one with 7.5W), a 3.5mm audio jack and Gigabit Ethernet.
Plugable USB-C Twin 4K Show Docking Station (UD-6950PDH) – two 4K shows at 60Hz

Professionals
- Twin 4K monitor assist for M1/M2/M3/Neo Macs
- 13 ports
- 100W PD to laptop computer
- Quick SD card reader
Cons
- Not for quick information switch
- North America solely
- Connection: USB-C (5Gbps)
- Software program: DisplayLink
- Max screens: 2
Should you don’t require full 40Gbps Thunderbolt, Plugable’s redesigned USB-C–based mostly UD-6950PDH docking station plus free-to-download DisplayLink software program can join two further 4K/60Hz shows to M1, M2, M3 and Neo Macs. Whereas plain M3 MacBooks can already join to 2 exterior shows, this DisplayLink dock permits plain M3 MacBooks to stay open with the 2 further shows connected (in any other case the M3 laptop computer’s lid needs to be closed). M4, M5 and M4 Professional MacBooks can already run two screens natively however utilizing a dock saves the laptop computer’s built-in ports.
It options a formidable 13 ports together with Gigabit Ethernet, SD and MicroSD card readers and 5 spare USB ports.
You received’t get information switch any quicker than 5Gbps so in the event you crave the total 40Gbps Thunderbolt bandwidth it is best to as a substitute contemplate the extra highly effective Plugable Thunderbolt 4 Docking Station with DisplayLink, reviewed above.
You need to use each of the dock’s HDMI ports or each DisplayPort or a mixture of every, relying in your monitor necessities. Two video ports will at all times be left empty, however the flexibility is welcome.
No availability outdoors of North America has but been introduced.
Learn our full
Plugable USB-C Twin 4K Show Docking Station (UD-6950PDH) evaluate
Hyperdrive Twin 4K HDMI 10-in-1 USB-C Hub – one 4K show at 60Hz, one 4K show at 30Hz
Professionals
- Helps two exterior shows at 4K
- 10 ports, inc. 5Gbps USB-C and USB-A
- 100W passthrough laptop computer charging
- InstantView simpler than DisplayLink
Cons
- Second 4K show is 30Hz relatively than 60Hz
- Requires USB-C charger
- Connection: USB-C (5Gbps)
- Software program: InstantView
- Max screens: 2
The Hyperdrive Twin 4K HDMI 10-in-1 USB-C Hub doesn’t use DisplayLink and as a substitute makes use of SiliconMotion’s InstantView.
Hyper says that it really works “with out having to obtain cumbersome drivers” however there may be some software program set up concerned, and it’s essential to permit InstantView entry to your Privateness settings in System Preferences. You join the hub or adapter to your M1/M2/Neo MacBook and discover the HyperDisplay app that seems in a Finder folder sidebar. Double-click the macOS InstantView icon and observe the System Preferences directions. As soon as this has been accomplished your MacBook will mechanically acknowledge the adapter from then on.
It’s a better resolution than DisplayLink however with the identical capability to permit M1, M2, M3 and Neo Macs to connect with a number of exterior shows.
This compact hub nonetheless consists of 10 ports, together with the all-important 2x HDMI. The primary show at 60Hz is added through HDMI and DP Alt-mode and the second at 4K 30Hz by way of HDMI and InstantView.
Additionally included are Gigabit Ethernet, MicroSD card reader (UHS-I), 3.5mm audio jack, 2x 5Gbps USB-A, and one 5Gbps USB-C. An extra USB-C PD port permits you to cost the related laptop computer at as much as 100W—useful because the hub itself makes use of up considered one of your laptop computer’s Thunderbolt ports.
Hyperdrive Twin 4K HDMI Adapter – one 4K show at 60Hz, one 4K show at 30Hz
Professionals
- Helps two exterior shows at 4K
- 100W passthrough laptop computer charging
- InstantView simpler than DisplayLink
Cons
- Second 4K show is 30Hz relatively than 60Hz
- Requires USB-C charger
- Connection: USB-C (5Gbps)
- Software program: InstantView
- Max screens: 2
This double-function hub is designed to offer two HDMI show ports for a MacBook M1/M2/M3/Neo, plus passthrough charging for the laptop computer. It doesn’t supply a bunch of different ports like its large brother, the Hyperdrive Twin 4K HDMI 10-in-1 USB-C Hub reviewed above. Because of this, it’s cheaper and is likely one of the most cost-effective options for including a number of displays to the restricted plain M1/M2/M3 Macs.
Just like the 10-in-1, it makes use of SiliconMotion’s InstantView relatively than DisplayLink software program to get previous the limitation.
The primary show at 60Hz is added through HDMI and DP Alt-mode and the second at 4K 30Hz by way of HDMI and InstantView.
Should you require extra ports, resembling Gigabit Ethernet, card readers and USB ports, contemplate the Hyperdrive 10-in-1 or one of many different hubs or docks reviewed right here..
Ugreen Revodok Professional 209 9-in-1 4K HDMI Docking Station – two 4K shows at 60Hz
Professionals
- Helps two exterior shows at 4K 60Hz
- 9 ports, inc. 10Gbps USB-C and USB-A
- 100W laptop computer charging
- DisplayLink file on dock connection
Cons
- Requires USB-C charger
- No card reader
- Connection: USB-C (10Gbps)
- Software program: DisplayLink
- Max screens: 2
Should you don’t want three exterior screens, we like this USB-C dock—the Revodok Professional 209 9-in-1 4K HDMI Common Docking Station—for its two HDMI and two DisplayPorts, which you’ll be able to select between when including two shows to your M1, M2, M3 or Neo MacBook. This could swimsuit most displays, until you favor direct USB-C shows.
Its spare USB ports (2x USB-A and 1x USB-C) are quick (10Gbps) for information switch, and one other USB-C port will be plugged right into a USB-C charger (not included, which is frequent with the docks reviewed right here) and provide as much as 100W of charging energy to the related laptop computer.
There’s additionally a Gigabit Ethernet port for quick, steady wired Web entry.
You should set up DisplayLink in your Mac—directions above—and Ugreen has made this straightforward by including the obtain recordsdata to your Mac whenever you first join the dock.
Learn a full Ugreen 9-in-1 USB-C dock review.
Alogic DV4 Common Quad Show Docking Station – one 4K show at 60Hz, two HD shows

Professionals
- Helps three exterior shows, one at 4K 60Hz
- 14 ports, inc. 5Gbps USB-C and USB-A
- 3x HDMI 2.0 and 1x DisplayPort 1.4 video ports
- 12W USB-C charging
- 85W PD laptop computer charging
Cons
- 2 shows at HD, not 4K
- Requires USB-C charger
- Connection: USB-C (5Gbps)
- Software program: DisplayLink
- Max screens: 2
With third-party DisplayLink drivers, this dock will assist as much as three shows on a Mac. You may join one 4K at 60Hz show (3840×2160 pixels) through both the DisplayPort or one of many HDMI ports. The opposite two shows through HDMI, nevertheless, are at a lesser HD (1920×1080) decision, each at 60Hz.
There’s a hyperlink to the DisplayLink obtain printed within the person handbook, though the kind within the handbook is the smallest we’ve ever seen!
The specs aren’t fairly as spectacular because the Satechi Triple 4K Show Docking Station, with 5Gbps a most data-transfer price, though charging wattage for USB-A (3.0) is as much as 7.5W every and USB-C is as much as 12W, which beats the Satechi.
Nonetheless, it does boast each SD and MicroSD card readers for inexpensive transportable storage choices, though UHS-I relatively than super-fast UHS-II. And, crucially, it’s cheaper, though you have to so as to add your personal USB-C 100W PD charger, in contrast to the Satechi Triple 4K Dock.
Professionals
- Helps two exterior shows at 4K
- 6 ports, inc. 5Gbps USB-C and 2x 5Gbps USB-A
Cons
- Second 4K show is 30Hz relatively than 60Hz
- Requires USB-C charger
- No passthrough laptop computer charging
- No card reader
- Connection: USB-C (5Gbps)
- Software program: InstantView
- Max screens: 2
The Satechi USB-C Multimedia M1 Adapter makes use of InstantView relatively than DisplayLink however the set up course of is virtually the identical whenever you observe the handbook.
It consists of 2x HDMI ports: considered one of which might assist a 4K show at 60Hz and the opposite at 30Hz.
It’s greater than a mere show adapter, although, because it additionally boasts USB-C PD passthrough charging at as much as 85W, one 5Gbps USB-C port, and two 5Gbps USB-A ports.
Though named after the M1 processor, it would additionally work with equally restricted M2 and M3 MacBooks, plus the MacBook Neo.
Alogic Twin 4K Common Compact Docking Station – two 4K shows at 60Hz
Professionals
- Helps two exterior shows at 4K 60Hz
- 7 ports, inc. 10Gbps USB-C and USB-A
- HDMI and DisplayPort variations
- 78W laptop computer charging
Worth When Reviewed:
₹19,990
- Connection: USB-C (10Gbps)
- Software program: DisplayLink
- Max screens: 2
The Alogic Twin 4K Common Compact Docking Station is available in two fashions—the CH2, which options two HDMI 2.0 ports; and the CD2, with two DisplayPort ports—so you’ll be able to select which most closely fits the exterior shows you already personal.
Two exterior screens are most likely sufficient for most individuals. Should you require three, see the opposite hubs and docks reviewed right here. Each screens will be as much as 4K at 60Hz. Fundamental directions are given on putting in the DisplayLink software program for M1, M2, M3 and Neo Macs.
This neat, compact dock doesn’t characteristic as many ports as others talked about right here however what it has are top-rated: each the USB-A and USB-C ports assist 10Gbps information switch. There’s additionally a Gigabit Ethernet port and a UHS-II SD card reader.
A passthrough USB-C port—it’s essential to add a suitably highly effective charger—can deal with 100W, though 22W is required by the dock so leaving 78W for laptop computer and gadget charging. The dock should be related to the laptop computer to permit gadget charging.
Professionals
- Helps three exterior shows (2x 4K; 1x HD)
- VGA in the event you want it
- 12 ports, inc 4x 5Gbps USB-A
- 85W laptop computer charging
Cons
- Requires USB-C charger
- Second 4K show is 30Hz relatively than 60Hz
- Third show is HD not 4K
- Connection: USB-C (5Gbps)
- Software program: DisplayLink
- Max screens: 3
The EZQuest Final Plus USB-C Multimedia Hub has two HDMI ports and a VGA port, and helps one 4K at 60Hz and one 4K at 30Hz through HDMI and 1080p HD through VGA. In order for you three 4K shows, look as a substitute on the Ugreen Triple Show Dock.
It additionally options 5Gbps USB-A ports, Gigabit Ethernet and card readers.
Just like the Ugreen dock, it requires a USB-C charger for energy and might go by way of as much as 85W to the related MacBook, however connects through slower 5Gbps USB-C.
Professionals
- Helps three exterior shows at 4K 60Hz
- 15 ports, inc. 10Gbps USB-C and USB-A
- 85W passthrough laptop computer charging
Cons
- No card reader
- DisplayPort didn’t work on our check Mac
- Connection: USB-C (10Gbps)
- Software program: DisplayLink
- Max screens: 3
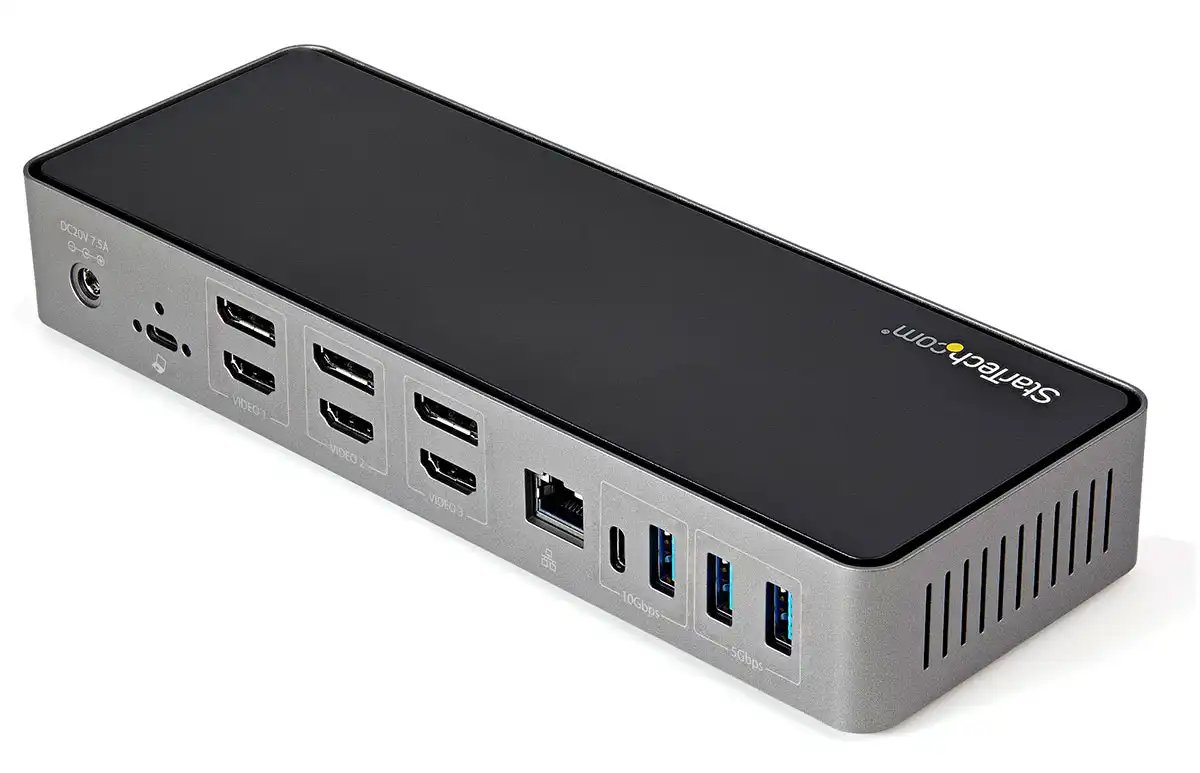
This triple-monitor DisplayLink-based docking station is positively bristling with ports: 15 in whole.
Most fascinating to us listed below are the six video ports: 3x DisplayPort 1.4 and 3x HDMI 2.0. This doesn’t imply you’ll be able to join six shows but it surely does ought to provide you with versatile choices for the kind of connection that suit your shows. Nonetheless, in testing we had no success linking through DisplayPort, which makes the additional choices relatively nugatory. As such, we desire the opposite docks and hubs reviewed above.
You should obtain the DisplayLink drivers to your M1/M2/M3/Neo Mac. StarTech.com has a hyperlink and a video, or simply observe our information above.
In addition to the half-dozen video ports are six USB ports: 2x USB-C (one at 10Gbps and one 5Gbps), plus 4x USB-A (one 10Gbps and three 5Gbps). The 5Gbps USB-C port can cost a related gadget at 18W, sufficient to fast-charge an iPhone. One of many 5Gbps USB-A ports can cost at 7.5W.
Rounding off the various ports are Gigabit Ethernet and a 3.5mm Audio In-Out.
There’s no card reader so as to add transportable storage however you could possibly join an adapter to one of many USB ports.
Baseus Nomos NU1 Spacemate Air – two 2.5K shows at 60Hz
Professionals
- Helps three exterior shows at 4K 60Hz
- 12 ports, inc. 10Gbps USB-C
- 90W passthrough laptop computer charging
- 12 ports
- Compact and transportable
- Constructed-in USB-C cable
Cons
- 2 shows at QHD, not 4K
- No energy from USB ports
- Requires USB-C charger
- No card reader
- Connection: USB-C (10Gbps)
- Software program: DisplayLink
- Max screens: 3
In some methods this “dock” is extra of a high-powered transportable hub. It connects to the laptop computer through its built-in braided USB-C 2.6ft cable that may carry information at 10Gbps and energy at 90W to the MacBook when related to a wall charger.
Most desk-bound docks are weighed down by an exterior energy brick, however the Baseus Spacemate is nimbler and might even draw sufficient energy from the laptop computer to function with energy coming in.
When connecting two displays through the Spacemate the decision is proscribed to QHD (2560×1440 pixels) that can be referred to as 2.5K to differentiate it from 4K (3840×2160) which most dual-screen DisplayLink docks supply.
There are six USB ports: 4 USB-A however simply two 10Gbps USB-C ports and none that may output any actual energy to the related units.
Learn our full
Baseus Nomos NU1 Spacemate Air 12-in-1 (Mac) Docking Station evaluate
Exterior show specs for Apple’s present laptops
Listed below are the exterior show specs for Apple’s present laptops, and what our workarounds can supply:
Foundry
Nonetheless, there are methods round these plain M1/M2/M3 and Neo limitations, permitting you to run two or extra exterior shows off your MacBook, which we’ll define right here. In every case, there’s a software program obtain and a docking station, hub or adapter required.
What it’s essential to learn about DisplayLink and InstantView
FAQ
Does DisplayLink and InstantView block Netflix or different streaming content material?
DisplayLink and InstantView are nice at including a number of displays to M1, M2, M3 and Neo Macs, however there’s a catch.
Some protected content material in Netflix, AppleTV, Amazon Prime, Disney+ or YouTube TV and different streaming functions might not play. The video stays black whereas audio retains taking part in.
That is all all the way down to how the macOS interfaces the DisplayLink driver used to entry graphics content material. As quickly as one DisplayLink-enabled display screen is related, protected content material turns into unavailable on all screens.
That is all the way down to the streaming platforms utilizing Excessive-bandwidth Digital Content material Safety (HDCP), which is Intel-developed digital copy safety (Digital Rights Administration or DRM) that forestalls copying of digital audio and video content material because it travels throughout connections.
As a result of macOS requires DisplayLink and InstantView to allow Display screen Recording, HDCP strikes in as a result of it thinks you’re really making an attempt to report the content material relatively than simply show it on display screen.
The way to allow streaming content material when utilizing DisplayLink or InstantView
To get spherical HDCP stopping your DisplayLink or InstantView setup exhibiting Netflix, Amazon Prime and different streaming companies, you could must disconnect all of the DisplayLink or InstantView screens, or swap to a browser aside from Safari or Chrome (for instance Opera or Firefox).
You may disable {hardware} acceleration in your browser to entry the protected content material.
On Google Chrome, go to Google Chrome settings, and click on on “Superior” after which choose “System”. Right here you’ll be able to disable “Use {hardware} acceleration when accessible”.
Choose “Relaunch” to activate the brand new setting.
If that doesn’t resolve the black problem, disconnect the docking station, and check out utilizing the laptop computer’s build-in show or the direct video ports of the laptop computer.
Uninstalling the software program is the last word resolution.
Does DisplayLink/InstantView influence show efficiency?
DisplayLink might introduce noticeable latency in some conditions or on sure displays, so high-end studios and professionals ought to look to a local resolution that doesn’t require third-party software program.
Native video offers smoother, full-resolution lag-free video with larger refresh charges (4K at 240Hz), which makes it excellent for video modifying and gaming. DisplayLink’s max is 60Hz—high quality for many of us however nowhere close to sufficient for video execs and avid gamers.
In addition to leaning on the CPU extra, DisplayLink can introduce noticeable lag with quickly altering content material resembling fast-moving video or gaming. It additionally suffers from restrictions to DRM (Digital Rights Administration) protected content material as utilized by streamers resembling Netflix and Apple TV that DisplayLink can, as famous above.
Thanks for studying! Be part of our group at Spectator Daily


![Is the Android we once knew slowly getting eroded? [Video]](https://spectatordaily.com/wp-content/uploads/2026/03/1773592223_Is-the-Android-we-once-knew-slowly-getting-eroded-Video-120x86.jpg)


